Chrono-Grip™ User Guide
Just got a ‘Grip and you’re wondering how to use it? You’re in the right place!
Initial Installation Instructions
For an overall introduction to the Chrono-Grip system, plus how to convert a full kit to a Single Pass variant!
Step-by-step instructions below 👇
Artemis Series Folks! This one is for you. 👨🚀
Step 1: Contents
Hooray for Strap Day! First things first, make sure that the item you received is in fact the item that you ordered. There may also be a few other goodies in there for you. 😉
Step 2: Prepare
Once you’re ready to install the Chrono-Grip onto your watch, here are a few best practices to consider before doing so:
A soft and clean work surface is usually recommended to prevent any damage to your watch, your work surface, (and your ego 😅).
Remove the strap that is currently attached to your watch first. If that strap has spring bars built into it, I would recommend using them (if they can be removed). If you have a “fixed bar” watch (with bars that do not remove), then you are good to go!
Insert said spring bars back into your watch on their own.
The Chrono-Grip Hook is intentionally packed separately from the elastic Strap Module for ease of installation.
Step 3: Install
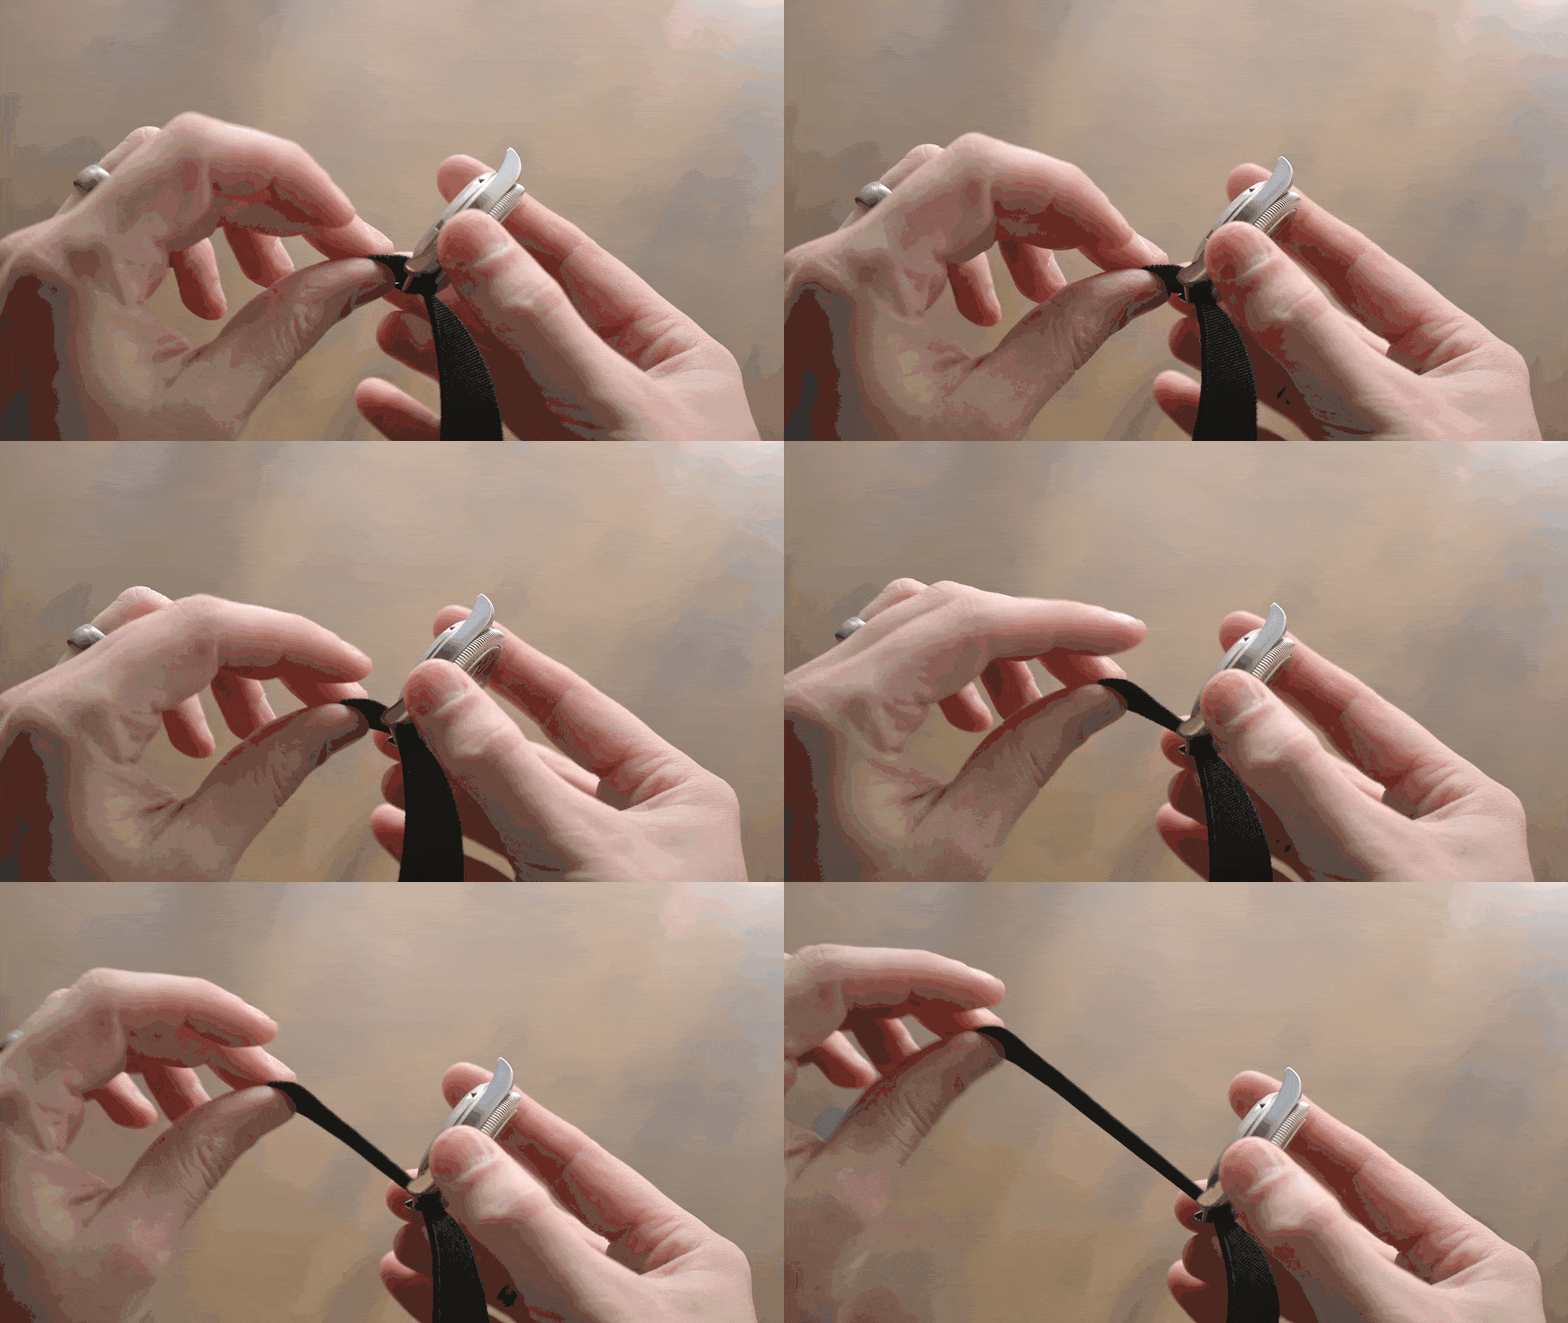
1) Pass it through: After sliding the Hook off the end of the strap, pull the elastic band through the 6 o’clock side of your watch, then up through the 12 o’clock side. This might require a little wiggle action if your lug space is unusually snug.
2) Reattach the Hook by sliding the elastic through the TOP strap slot. It’s a tight fit, but that is completely intentional.
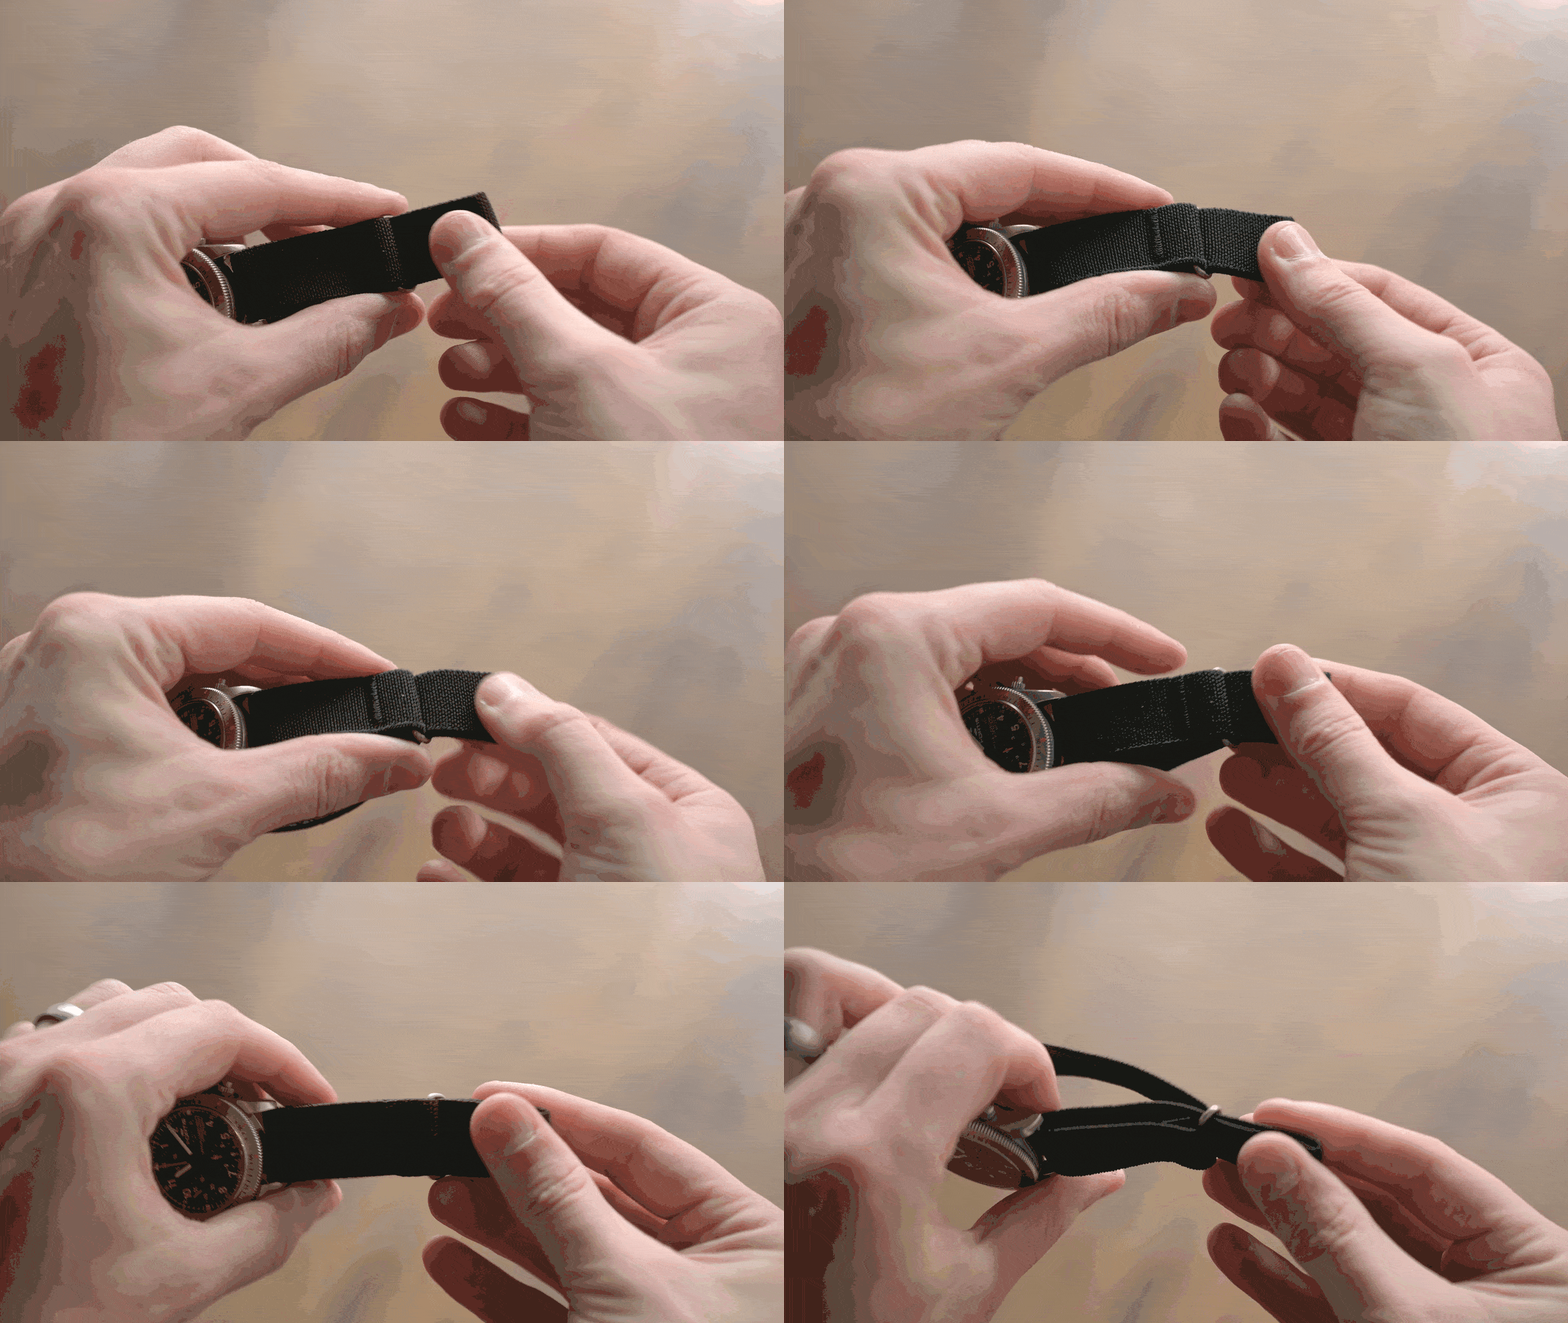
3) Pull the elastic out from below the watch to form a loop.
4) Pinch the loop together and insert it through the ring slider. This too may require some wiggling. But you have now formed the Adjustment Loop! (Pro Tip: Insert one corner first to get it started)
5) Hook it up! To complete the assembly, simply attach your newly formed Adjustment Loop onto the Hook! This is usually performed once you’ve slipped your hand through the main opening and are ready to wear your watch.
6) DONE! The initial installation is complete! All that’s left is to fine tune the fitment and lock down your sizing! 🎉
To Engage “Lock Mode”: Once you’re happy with the size, just slide the end of the elastic up through the bottom strap slot of the Hook as well, and pull it snug. Then say out loud, “that’s not going anywhere.” 🔒
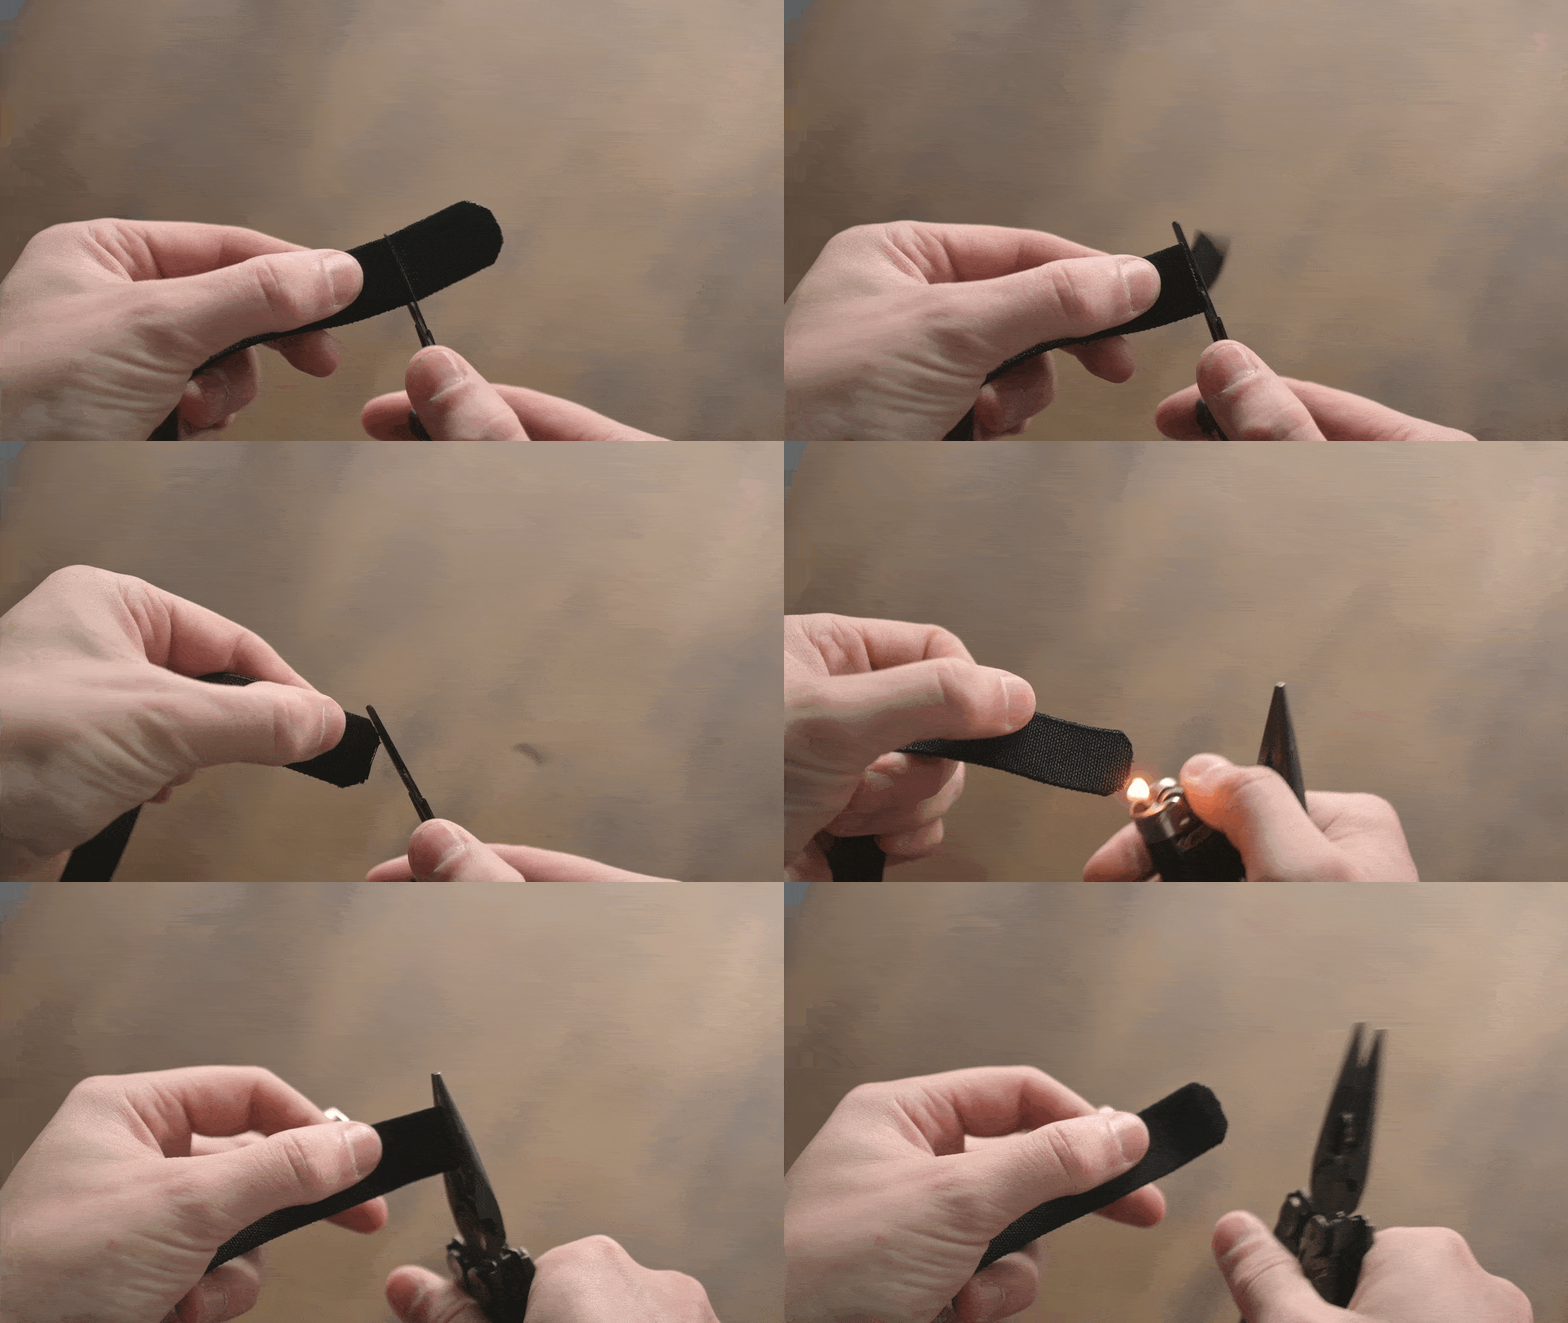
7) Trimming (Optional) : After you’ve found the sweet spot for your Adjustment Loop, the tail end of your elastic might be obstructed by the base of your watch lugs. If this is the case, you may elect to perform a Field Alteration to trim the end of the elastic down. This is permanent, so perform this task little by little with great caution.
Simply trim, burn, and squeeze! Tapering the end is important for ease of functionality with the Strap Slots. They are made to a very tight tolerance to grip the elastic, so a taper is necessary to slide the end of the elastic through.


